This post will be used to host links to all the Moodle workshop, support videos, and links. Links will be grouped as best as possible by topic. If there is a Moodle support topic you would like to request, please contact Jedidiah Rex.
Due to current circumstances, students will be encouraged to enroll in courses that they might wish to take. Once a student enrolls in a course they cannot unenroll themselves. This may create a scenario where students are enrolled in Moodle classes in which they will ultimately not participate. Each instructor can manage their enrollments in Moodle. An instructor may wish to prohibit other students from enrolling in their course after the add/drop deadline. This can be accomplished by setting a password for your course, which Moodle calls an enrollment key. Steps for unenrolling students and setting an enrollment key follow.
Unenrolling Students
Unenrolling students is straightforward in Moodle. Enrollments may be managed from the Participants page. The steps to do so follow.
1. Click Participants located in the Navigation block or Users > Enrolled Users located in the Administration block.
2. Click the Unenroll button located in the “Status” column.
3. Click the “Unenroll” button.
Add an Enrollment Key
Once the add/drop deadline passes, you may want to prohibit other students from entering your Moodle course. The easiest way to do so is the an enrollment key. This is a password that students will need if they want to enroll in your course. Students who are already enrolled will not be affected. To set an enrollment key please follow the steps below.
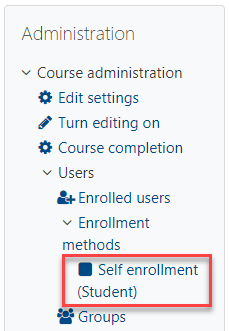
1. Click Users > Enrollment Methods > Self Enrollment (Student) located in the Administration block.
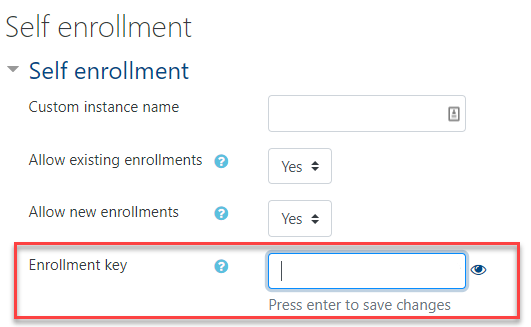
2. Enter a password in the “Enrollment Key” field.
3. Scroll down and click the “Save changes” button.
The ability to unenroll students and prohibit unwanted students should provide the control you need for the coming term. Please feel free to contact me if you have questions about the details shared here.
In order to make video meetings as secure as possible Zoom will be implementing some changes to how meetings will be set up. In short a meeting will need to have either a passcode or waiting room enabled. if neither are configured then the waiting room will be applied.
The notice from Zoom:
Dear Valued Customer,
At Zoom customers are our number one priority, and we always strive to bring you the best, most secure video meeting experience in the industry. As we have previously communicated, starting September 27th, 2020, we will be requiring that all meetings have a Passcode or Waiting Room enabled. We have designed these security measures to give you control over your meeting security options while keeping the join experience as frictionless as possible.
> For meetings that do not have either a Passcode or Waiting Room enabled by September 27th, Zoom will enable a Waiting Room for you. > You can customize the Waiting Room experience so individuals within your account, or on an approved list of domains, can bypass the Waiting Room and directly join the meeting. > You can find meetings that are scheduled without a Passcode or Waiting Rooms by pulling the following report. > We have also improved our Waiting Room notifications so the meeting host can now receive a visual and auditory notification that an attendee has entered the Waiting Room.
For more details, including a comprehensive FAQ document, please visit our Support page. If you have additional questions, please reach out to your Customer Success Manager or our Support Team.
As we prepare to teach in a flexible manner for the fall, one question that comes up is how to provide what may have been lecture in a face-to-face class, to what will be a distance/online class in the fall. It is possible to use Zoom and PowerPoint to record a video containing a slideshow and webcam.
The general order of operations to use Zoom to record a PowerPoint slideshow is:
Open PowerPoint and have the presentation ready to show.
Open the Zoom desktop app in the same space as the PowerPoint.
Start the Zoom meeting, share the screen containing the PowerPoint window, begin recording.
Start the PowerPoint slideshow.
You should see yourself in a small window on top of the presentation. You can move, resize, and minimize this window.
Proceed through the presentation. Adjust your video/webcam window as you need through the presentation, but try to minimize the amount of movement.
Note: You may want to format your slides to account for the webcam overly by leaving that area of the slides empty. Doing so will minimize how much you need to move the webcam overlay.
Close PowerPoint. End the screen share. Stop the recording and then leave the meeting. The video will begin to process/convert. Once it is complete a folder with the video will open.
The process looks like a lot written down, but it isn’t as challenging in practice as it might appear.
PowerPoint Settings
There are two settings you will want to address in the Slideshow settings/ribbon. Take note of the monitor PowerPoint will use. Make sure that this is the same as the screen you will share from Zoom. Deselect “Use Presenter View.”
PowerPoint: Zoom Recording Settings
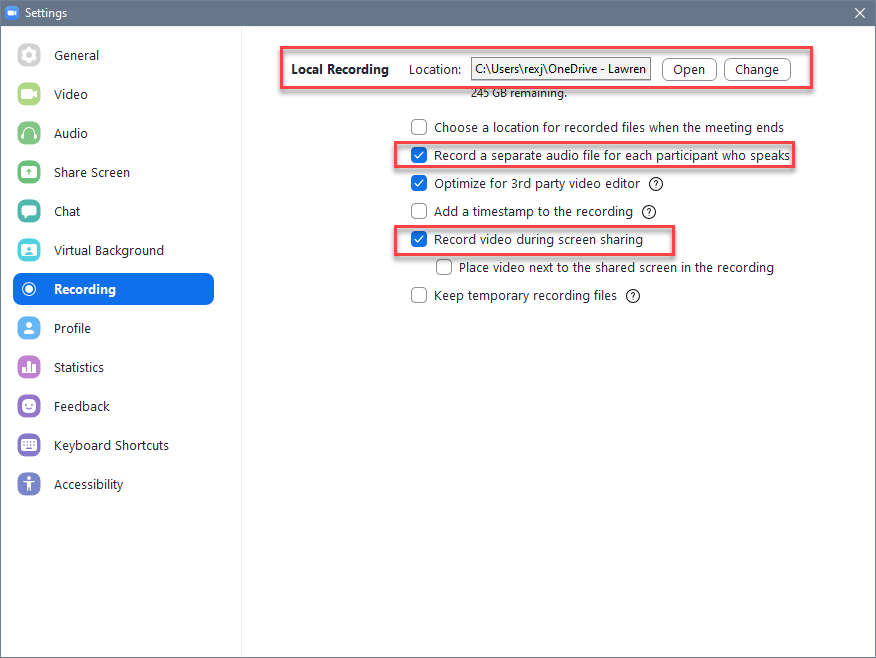
Zoom Settings
These settings may be accessed from the Zoom desktop app by clicking the gear icon underneath your profile image in the upper-right corner of the app window. You will only have to set these once.
In the Recording settings you will want to make sure to that you: